How the Paver Installation Process Works Step-by-Step
People searching for how the paver installation process works step-by-step are often looking to understand the project and find local contractors who can expertly handle each stage.
Understanding how the paver installation process works step-by-step can help property owners make informed decisions when planning outdoor enhancements. Whether preparing a new patio, walkway, or driveway, knowing the general stages involved can clarify what to expect and ensure the project aligns with personal goals. This knowledge is especially useful for those in the area exploring options to improve curb appeal or create functional outdoor spaces, as local contractors often provide detailed guidance and expert craftsmanship throughout each phase of installation.
Many property owners find that familiarizing themselves with the typical paver installation process helps streamline communication with service providers and ensures the project progresses smoothly. Local contractors can handle each step-from site preparation and base installation to laying pavers and finishing touches-making the process more efficient and tailored to specific property needs. Continuing to explore how the process works step-by-step can empower property owners to make confident choices and connect with experienced professionals ready to bring their outdoor visions to life.
- Paver Installation - homeowners planning to upgrade their outdoor space can rely on local contractors to handle the entire process efficiently.
- Patio or Walkway Construction - those needing durable, attractive paved surfaces often seek local pros to ensure proper site preparation and installation.
- Driveway Paving - property owners wanting a long-lasting driveway can connect with local service providers experienced in paving and surface leveling.
- Outdoor Living Space Projects - individuals looking to create functional patios or entertainment areas can benefit from local pros’ step-by-step installation approach.
- Paver Repair and Replacement - clients needing to restore or update existing paved surfaces can work with local contractors familiar with the paver installation process.

When homeowners search for how the paver installation process works step-by-step, they are often seeking a clear understanding of what to expect when planning to add or upgrade paved surfaces around their property. This topic is commonly related to projects like creating a new driveway, installing a patio, or updating walkways. Many individuals want to know the sequence of tasks involved, the typical timeline, and what kind of preparations or decisions are necessary beforehand. Understanding this process helps homeowners feel more confident about hiring local contractors and ensures they are prepared for each stage of the project.
The paver installation process is connected to a variety of property plans and problem-solving needs. For instance, some property owners may be addressing drainage issues, seeking to improve curb appeal, or preparing for outdoor entertaining spaces. The process also involves considerations like choosing the right paver materials, designing the layout, and ensuring proper foundation support. By understanding how the process unfolds step-by-step, homeowners can better communicate their goals with service providers, ensuring the project aligns with their expectations and functional needs.
Properties commonly involved in paver installation projects include residential yards, commercial storefronts, and community outdoor spaces. Residential properties often feature driveways, patios, or walkways that require durable, attractive surfaces. Commercial properties might focus on creating welcoming entryways or functional outdoor areas. The size and scope of these projects can vary widely, but all require careful planning and execution to ensure longevity and visual appeal. Local contractors experienced in paver installation can assess the specific property type and help tailor the process to meet the unique demands of each project.
Understanding how the paver installation process works step-by-step provides homeowners with practical insight into what the project entails. It typically begins with site assessment and planning, followed by excavation and grading, then laying a stable base, and finally installing the pavers themselves. Each step plays a crucial role in ensuring a durable, long-lasting finished surface. By connecting with local service providers who specialize in this process, homeowners can access the expertise needed to navigate each phase smoothly, making the entire experience more manageable and aligned with their property’s needs.
Concrete paving projects - professionals skilled in preparing subbases and laying durable surfaces, similar to paver installation processes.
Patio construction - involves planning, site preparation, and precise surface installation, aligning with the steps in paver installation.
Driveway installation - requires careful surface grading and layering, paralleling the foundational work in paver projects.
Walkway and pathway creation - involves detailed planning and installation techniques comparable to paver laying procedures.
Landscape edging projects - require precise placement and surface preparation, similar skills used in paver installation steps.
Retaining wall construction - involves site assessment, planning, and building techniques akin to paver installation processes.
When comparing local contractors for paver installation services, it is important to consider their experience with similar projects. A contractor who has handled paver installations comparable in size and scope can often demonstrate a deeper understanding of the process and potential challenges. Homeowners should inquire about the types of projects the service provider has completed and seek examples or references that reflect their expertise in paver installation. This helps ensure that the contractor is familiar with the specific steps involved and can deliver results that meet expectations.
Clear written expectations are essential when evaluating potential service providers. A reputable contractor should be able to provide a detailed outline of the paver installation process, including the preparation, layout, installation, and finishing steps. This documentation can serve as a reference throughout the project, minimizing misunderstandings and ensuring everyone is aligned on the scope of work. Homeowners should also ask about warranties or guarantees related to the installation, as these can offer additional peace of mind and clarity about what is included in the service.
Effective communication and reputable references are key indicators of a dependable contractor. Service providers who are transparent about their methods, willing to answer questions, and able to provide references from past clients typically demonstrate professionalism and reliability. When speaking with references, homeowners can gain insights into the contractor’s responsiveness, quality of work, and ability to adhere to project timelines. Good communication fosters a smoother project experience and helps ensure that the paver installation process progresses as planned, resulting in a finished product that aligns with the homeowner’s vision.
Property owners often search for how the paver installation process works step-by-step when they are planning practical projects around their homes and businesses. Local pros provide Paver Installation Process services for everyday jobs and straightforward project options.
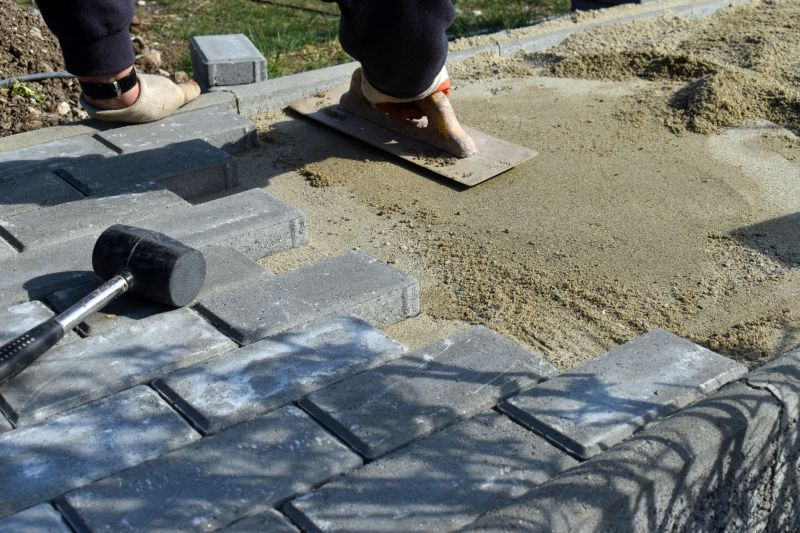
The process of installing pavers typically begins with a thorough assessment of the project area, where local contractors evaluate the space to determine the best layout and materials for the job. Once the planning is complete, the site is prepared by removing any existing surface, grading the ground to ensure proper drainage, and laying a stable base layer, often consisting of gravel or sand. This foundational work is essential for creating a durable and even surface that can withstand regular use, making it a common step that property owners might want to understand before hiring local pros to handle the installation.
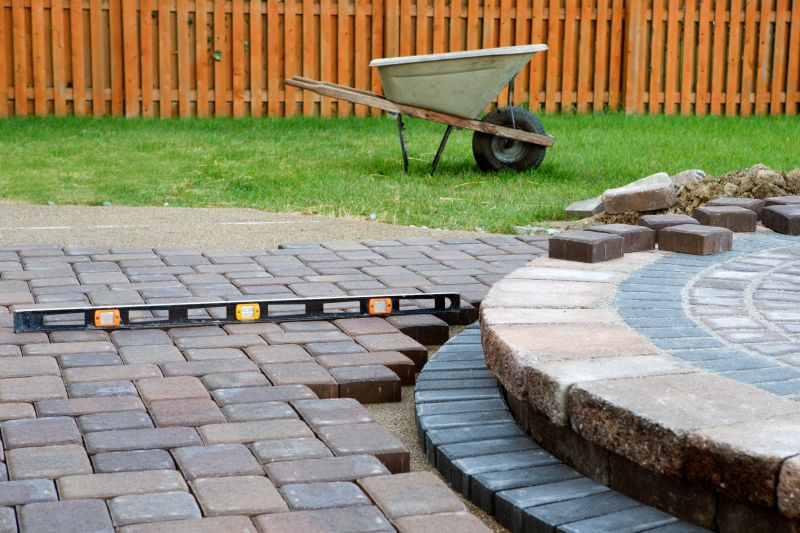
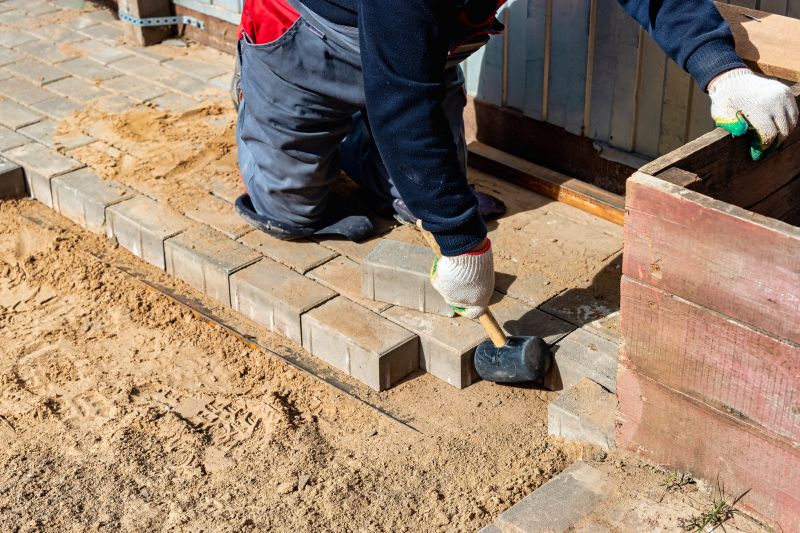
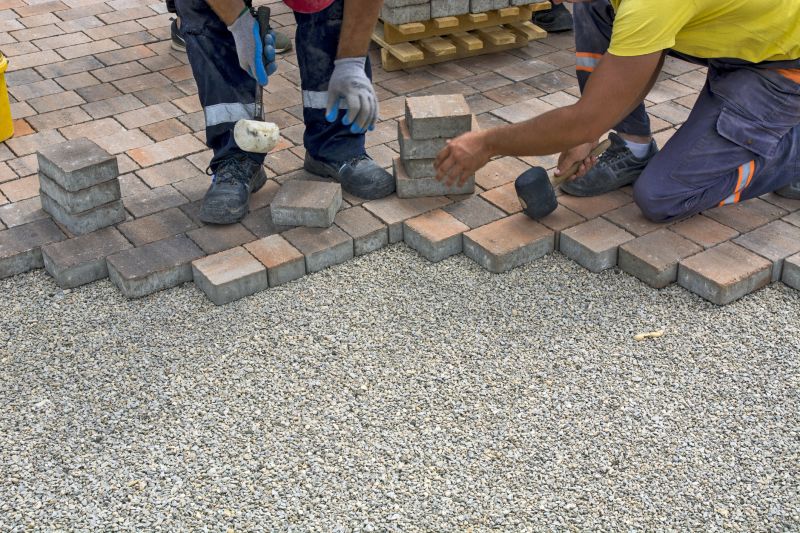
After the base is prepared, the pavers are carefully laid out according to the chosen pattern, with local service providers ensuring proper alignment and spacing. Once the pavers are in place, they are secured by adding joint sand or other stabilizing materials, which helps lock everything in position. The final step involves compacting the surface to settle the pavers firmly into the base, resulting in a smooth, stable finish. Property owners often look into these steps to better understand what’s involved in the paver installation process and to find experienced local contractors capable of managing each stage efficiently.
What is the first step in the paver installation process? The initial step involves preparing the site, which includes clearing the area, removing existing surfaces, and ensuring the ground is properly graded for stability.
How do local contractors handle the base preparation? Local service providers typically excavate the area, lay a foundation of compacted gravel or crushed stone, and ensure a level surface to support the pavers.
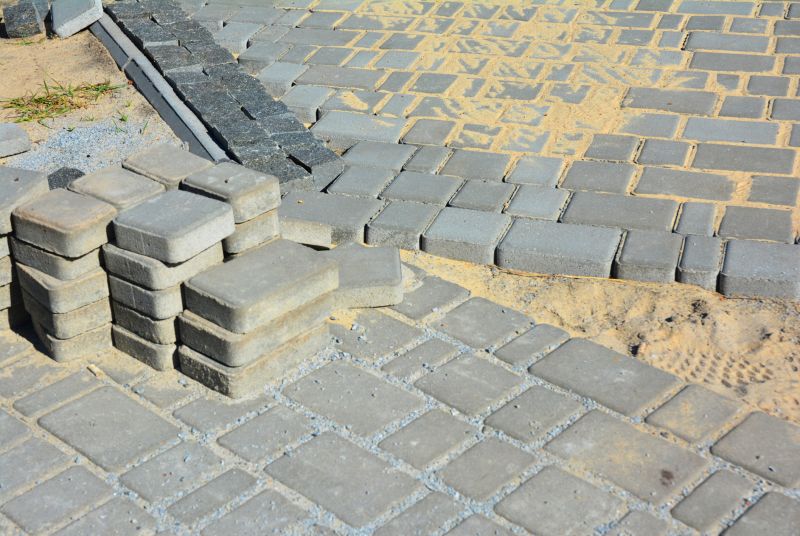
What materials are used during the paver installation? Pavers are usually made of concrete, brick, or stone, and are laid over a bedding layer of sand or gravel that helps with leveling and stability.
How is the paver pattern determined and installed? Contractors often work with the homeowner to select a pattern, then carefully lay the pavers in that pattern, ensuring proper spacing and alignment.
What finishing steps are involved after laying the pavers? The final steps include adding joint sand between the pavers, compacting the surface, and applying sealant if desired to enhance durability and appearance.
Understanding site preparation - property owners can plan for proper site clearing and grading by working with local contractors who handle site prep before paver installation begins.
Selecting the right paver materials - choosing durable and visually appealing pavers helps ensure the finished project meets the desired look and function.
Following installation steps - property owners can learn how local pros lay and secure pavers to create a stable and long-lasting surface.
Finishing and sealing options - applying sealers or surface treatments can enhance the appearance and longevity of the paved area, with guidance from local service providers.
If you are thinking about how the paver installation process works step-by-step for a property, this guide is meant to help you understand this topic, the typical project types, and how different options might fit your plans.
When you are ready, you can use the quote form on this page to share a few details about your project. From there, local pros can review the basics and follow up with options that match what you have in mind.